Cloud Run and IAP
Cloud Run is the serverless platform from Google Cloud. It allows you to use any language, any library, any binary which makes it very flexible. Most of the enterprise applications use authentication and access to it is controlled and this can be hard to achieve and can be costly is you want to build a custom solution. Instead, you may leverage google security by using IAP (Identity Aware Proxy) on top of the Cloud Run deployment.
Prerequisites
- GCP project with billing enabled. If you don’t have one then sign-in to Google Cloud Platform Console and create a new project
- Access to a standard internet browser
The architecture
This is the overview diagram of the solution:

The implementation
This solution has 3 main components: the application deployment, IAP configuration, and external load balancer configuration.
Let’s start by setting up some environment variables:
PROJECT_ID=$(gcloud config list project --format='value(core.project)')
REGION=us-central1
Application deployment
Let’s use the most simple web server written in go
package main

import (
	"fmt"
	"net/http"
	"os"
)

func main() {
	http.HandleFunc("/", func(w http.ResponseWriter, req *http.Request) {
		fmt.Fprintf(w, "hello from cloud run\n")
	})
	http.ListenAndServe(":"+os.Getenv("PORT"), nil)
}
and then deploy the application to cloud run
gcloud run deploy cloud-run-iap \
    --source . \
    --region $REGION \
    --project $PROJECT_ID \
    --no-allow-unauthenticated \
    --ingress internal-and-cloud-load-balancing
Configure IAP
Configure the OAuth consent screen
- Go to the OAuth consent screen in the “APIs & Services” section
- Choose “External” and then hit “Create”
- Under Support email, select the email address you want to display as a public contact. This email address must be your email address, or a Google Group you own.
- Enter the Application name you want to display.
- Click Save.
- Navigate again to the OAuth consent screen and add your user to the list of the test users.
Configure OAuth credentials
- Go to the Credentials page in the “APIs & Services” section
- On the Create credentials drop-down list, select *OAuth client ID.
- Under Application type, select Web application.
- Add a Name for your OAuth client ID.
- Click Create. Your OAuth client ID and client secret are generated and displayed on the OAuth client window.
- Click OK.
- Select the client that you created.
- Copy the client ID to the clipboard.
- Add the universal redirect URL to the authorized redirect URIs field in the following format:
https://iap.googleapis.com/v1/oauth/clientIds/CLIENT_ID:handleRedirect
where CLIENT_ID is the OAuth client ID that you just created and it should be similar to this
75641163784-some-random-number.apps.googleusercontent.com
Copy and paste values for the CLIENT_ID and CLIENT_SECRET, these will be used in the next steps
CLIENT_ID=[YOUR_CLIENT_ID]
CLIENT_SECRET=[YOUR_CLIENT_ID]
Configure the load balancer
After the service has been deployed and IAP has been enabled the next step is to create a NEG (Network Endpoint Group). A network endpoint group (NEG) is a configuration object that specifies a group of backend endpoints or services. You can read the full documentation here Network endpoint groups overview
Create the NEG:
gcloud compute network-endpoint-groups create cloud-run-iap-neg \
    --project $PROJECT_ID \
    --region=$REGION \
    --network-endpoint-type=serverless  \
    --cloud-run-service=cloud-run-iap
Create the backend service:
gcloud compute backend-services create cloud-run-iap-backend \
    --load-balancing-scheme=EXTERNAL \
    --global \
    --iap=enabled,oauth2-client-id=$CLIENT_ID,oauth2-client-secret=$CLIENT_SECRET
Add the serverless NEG as a backend to the backend service:
gcloud compute backend-services add-backend cloud-run-iap-backend \
    --global \
    --network-endpoint-group=cloud-run-iap-neg \
    --network-endpoint-group-region=$REGION
Create the url map
gcloud compute url-maps create cloud-run-iap-url-map \
  --default-service cloud-run-iap-backend
IAP requires https, self signed certificates are not accepted and the only way to make this work is to user a real certificate and a real domain or subdomain.
Reserve an IP address first
gcloud compute addresses create cloud-run-iap-ip \
    --network-tier=PREMIUM \
    --ip-version=IPV4 \
    --global

gcloud compute addresses list --filter cloud-run-iap-ip
Update the next variable with your domain address. Example: test.example.com
DOMAIN_ADDRESS=your-domain-address
Update your dns records such as DOMAIN_ADDRESS to point to this ip address.
Create a certificate for this domain/subdomain. You can create certificate using letsencrypt.org.
Make sure to use the same DOMAIN_ADDRESS when you create the certificate. Download the certbot if you don’t have it.
sudo certbot certonly --manual -d $DOMAIN_ADDRESS --preferred-challenges dns --cert-path . --key-path .
Make sure to follow the instructions in order to obtain the certificate for you DOMAIN_ADDRESS
After you have the certificate, add it to the certificates list
gcloud compute ssl-certificates create cloud-run-iap-cert \
    --certificate cert.pem \
    --private-key key.pem
Create the https proxy
gcloud compute target-https-proxies create cloud-run-iap-http-proxy \
    --ssl-certificates cloud-run-iap-cert \
    --url-map cloud-run-iap-url-map
Create the global forwarding rule
gcloud compute forwarding-rules create cloud-run-iap-forwarding-rule \
    --load-balancing-scheme=EXTERNAL \
    --network-tier=PREMIUM \
    --address=cloud-run-iap-ip \
    --global \
    --ports 443 \
    --target-https-proxy cloud-run-iap-http-proxy
Done! Give some time for the load balancer to setup all the components and then you can test if your setup works as expected.
If you navigate to the DOMAIN_ADDRESS you will be redirected to the google login page, sign-in with you account and after login you will see a page like this.
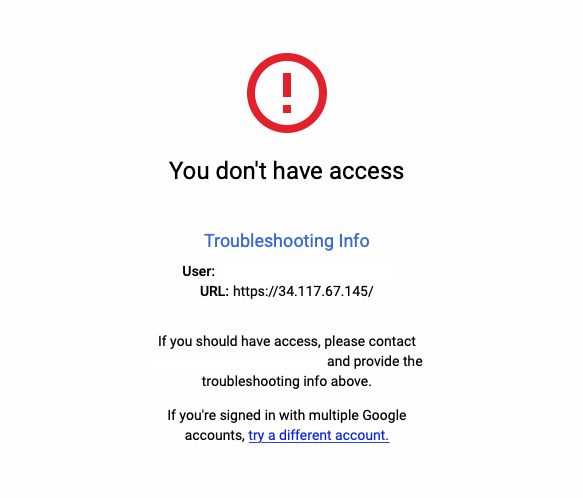
And this is ok. IAP is working.
Next we need to add users to our backed service. Let’s get the current user email add the name of the backend service
BACKEND_SERVICE=$(gcloud compute backend-services list --filter="name~'cloud-run-iap-backend'" --format="value(name)")
USER_EMAIL=$(gcloud config list account --format "value(core.account)")
and then grant the role IAP-secured Web App User (roles/iap.httpsResourceAccessor)
gcloud iap web add-iam-policy-binding \
    --resource-type=backend-services \
    --service $BACKEND_SERVICE \
    --member=user:$USER_EMAIL \
    --role='roles/iap.httpsResourceAccessor'
Wait a bit and then refresh the page. You should see the “hello from cloud run” message.
If you wonder why I didn’t use the Cloud Run permissions and just add the authorized users there, the answer is because you will get this:

Cloud run permission will not handle the redirect to login and it will not show that nice page with contact information when the user does not have the required permissions.
Cleaning up
# delete the forwarding-rule aka frontend
gcloud -q compute forwarding-rules delete cloud-run-iap-forwarding-rule --global
# delete the http proxy
gcloud -q compute target-https-proxies delete cloud-run-iap-http-proxy
# delete the url map
gcloud -q compute url-maps delete cloud-run-iap-url-map
# delete the backend
gcloud -q compute backend-services delete cloud-run-iap-backend --global
# delete the NEG
gcloud -q compute network-endpoint-groups delete cloud-run-iap-neg --region=$REGION
# delete the ssl certificate
gcloud -q compute ssl-certificates delete cloud-run-iap-cert
# delete the ip address
gcloud -q compute addresses delete cloud-run-iap-ip --global
# delete the cloud run service
gcloud -q run services delete cloud-run-iap --region $REGION
Conclusion
Combining Cloud Run and IAP allows you to be benefit from the full managed serverless platform protected by the best security you can get.